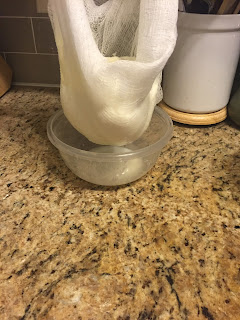
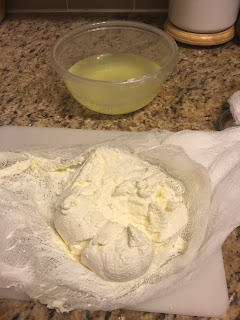
So... here's the how-to:
INGREDIENTS:
16-32 oz Full Fat Unflavored Yogurt (depending on how much whey/cheese you would like... you can get about 1/3-1/2 of the amount you started with as cheese in the end)
TOOLS:
Cheesecloth
Dish
2 Rubber Bands or 1 Wire Clothes Hanger
PROCEDURE:
1. Fold cheesecloth over to make 6-8 layers.
NOTE: If you don't have/can't find cheesecloth then use a clean, very thin towel. I don't recommend this method as I have always used the cheesecloth but I have heard that it works just fine. The cloth must be very thin though or it will absorb too much of the whey.
2. Tie one side of the cheesecloth to the hanger and place the hanger on a cabinet handle or ledge.
3. Place a bowl beneath where the cheesecloth will be hanging and drape the, now hanging, cheesecloth in the bowl.
4. Put the yogurt into the cheesecloth.
5. Tie the other side of the cheesecloth to the hanger.
6. Insure that the bowl is directly beneath the hanging cheesecloth.
7. Check back in the morning... you should have cheese in the cloth and whey in the bowl.
NOTE: If you do not want to use a hanger you can place the cheesecloth, centered, over the bowl. Then place the yogurt in the cheesecloth. Finally, use 1 rubber band to close the cheesecloth and the other to attach it to the cabinet door.
8. Place the whey in an airtight container and place in the fridge. It will last at least a month so long as you made to sure to strain out all of the yogurt. The whey will be a slightly yellow tinted translucent liquid.
9. Place the cheese in a separate airtight container and place in the fridge. The cheese will last about a week in the fridge.
Curious where I get my ingredients? I get my ingredients all over the metroplex, on Amazon and through Young Living as a distributor. Don't want to search out stores to pick them up? I'll make it easy! You can place an order through me for any oils you may need and here are some quick links for the non-perishable ingredients and tools on Amazon should you wish to order online:


No comments:
Post a Comment