Showing posts with label Expedition 500. Show all posts

Friday, September 11, 2015

6 Pack Bags Expedition 500 VS Isolator Fitness Isopack, Part Three: The Comparison


It was a difficult decision but I eventually settled on keeping the Isopack rather than the Expedition 500. Both bags seem very well made and quite useful. They also have many of the same features as they are meant to satisfy the same customer needs so it really all comes down to what you are needing in the particulars. For instance, if you are more concerned with branding then you may go with the Expedition as it is by a more well known/popular brand. If you are looking for a lot of space or need depth in the main compartment like I do then you will likely chose the Isobag as it's main compartment is deeper and a bit more roomy than the Expedition. If you are looking for a bag that comes with all the extras then you may want to go with the Expedition. Should you need to keep your meals cool for 12 hours or longer then you will likely go with the Isopack... its all about priorities. I made my choice because I loved the following about the Isopack:
  • lighter bag
  • meal area was open and held slightly more
  • ice packs were not gel and had a longer chill time
  • less compartmentalization of the pockets meant there was more storage space
  • easily replaced containers OR I could use my own
  • roomier main compartment that can store more
Things I liked better about the Expedition:
  • SureLock containers
  • included drawstring bag and supplement container (and in some cases shaker bottle)
  • shorter bag (I'm short... enough said) 
  • meal area did not collapse when empty
  • very nice padding on the back and straps
  • labels (I know I said I liked the lack of compartmentalization but the organizer fiend in me loves those labels nevertheless!)

I wanted to offer a quick comparison chart between the two bags as the last piece of this series. If you have any questions about the bags just let me know and I will do my best to answer them!


Isobag Expedition 500
Dimensions 14 in x 10 in x 21 in 12 in x 12 in x 20 in
Weight 5 lbs 9 lbs
Supplement Container Not Included Included
Drawstring Bag Not Included Included
Chest Strap Included Included
Meal Area 12x8x6 in., holds 4-38/28 oz or 6-16 oz/12 oz removable rack, hold 5 SureLock containers
Meal Area Opens two openings on the sides one opening on the front
Meal Area Stability partially collapses when empty does not collapse when empty
Containers 2- 12 oz,2- 16 oz,2- 28 oz, 2- 38 oz 5 SureLock containers
Ice Packs 2 large Isobricks 2 small gel ice packs and one large gel ice pack
Chill Time 12-16 hours 8+ hours
Water Bottle Storage 2 mesh side pockets 2 zip closed pockets
Padded Back Good Best
Laptop Area lined, will fit 17" laptop and tablet lined, will fit 17" laptop and tablet
Storage Pockets unlabeled, non-item specific labeled, item specific
Main Compartment largest, no divisions large but divided by meal compartment

Thursday, September 10, 2015

6 Pack Bags Expedition 500 VS Isolator Fitness Isopack, Part Two: The Expedition 500


It was difficult to find a good comparison online of the two meal management backpacks I had narrowed it down to- the Expedition 500 and the Isopack. Since this was the case I ended up ordering both the Expedition 500 and the Isopack to compare and decide which worked best for me. I decided on the Isopack so the Expedition will be returned. I'm hoping that this post will help someone else that is trying to decide which to purchase so that they won't have to order blindly. Due to the large number of photos I have to divide the comparison into several pieces, here is the second... the Expedition 500!


There is a chest clip to help distribute the weight. This is quite heavy even empty. I couldn't weigh it but I read that it was over 12 pounds empty and that seems pretty accurate. After it was full I definitely needed the weight distribution but it was just too heavy for me to carry easily so that was one of the negatives of this bag.


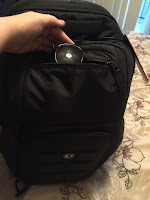
There are two front pockets. The very front one is meant for sunglasses and it fit mine quite well. The inside of the pocket is lined to avoid scratching your glasses. The only problem with this pocket is that once you fill the pocket behind it there is no longer room for the glasses if they aren't completely flat... which mine are not.
The pocket behind it has two smaller compartments as well as a clip and a mesh pouch. I was able to put my wallet in this compartment and my keys in the sunglasses pouch.


Next up is the laptop compartment. I was able to fit the same laptop, kindle and paper notebook in this laptop pouch as in the Isopack. This pocket is lined with the same fabric as the sunglasses pocket to avoid scratching. There is a pouch for a tablet in this backpack just as in the Isopack.


Here is the laptop as well as the kindle that was placed in the backpack.


Inside the main compartment there are two small items that are not included with the Isopack: a drawstring bag and a vitamin/supplement storage container.


These were nice additions but I personally didn't need them as I already had a set. Some bags seem to also come with a shaker bottle (I believe it was the black and red set from one of the sellers on Amazon) but that was another item that I didn't need.

There are two side pockets that zip closed when not in use (or if you want to use them as another pocket) that convert into water and shaker bottle holders when unzipped. Zipping the pocket up helps to lock the bottle in place. I saw no issues with slippage of the bottles I placed in the pockets to test it out. 


On to the inside of the main compartment... the front lays out for easy access to the inside pockets. There is one on the front of the bag, one on the top of the meal management section, a pocket on the back of the bag and two small pockets on the sides of the meal compartment. The side mesh compartments would fit a can of soda or small bottle of water. When you first get the bag you will see that the drawstring bag is located on top of the meal compartment. This is where I would continue to keep the bag. The last pocket, on the back, does not go all the way to the bottom of the bag but would be a good place to keep a laptop cord and wireless mouse.


I was able to put two smaller bags on the side of the meal management box but I did not use the mesh pouch. You should be able to put a pair of flats in the bag, one on each side in this area. A pair of minimalist running shoes would likely also fit here. A set of workout clothes fit behind the meal management area and left room to put items in the pouch above it or just atop the clothing. This is where I would put my toiletry bag. 


On top of the meal management bag you can put a few other odds and ends but cannot overfill the area atop the meal management area as the front of the bag angles in when you close the bag. 

I wasn't able to fit as much into this bag as I could in the Isopack. I was able to fit everything except the following and the ball:


from the same items that were in the carry-on set of items as in the other bag...


And finally on to the meal management area. Here is what you see when you open the bag. There are five containers in a removable rack system as well as two small and one large gel ice pack.


I wasn't a big fan of the rack system as finding replacements or containers the correct size proved to be a bit difficult. I did like that they are leak proof though! I also liked the fact that they seem very durable. Here is a photo of the rack system both extended and flat when removed as well as the meal area empty with and without the rack.


As you can see the rack simply snaps into the top of the meal area and drops down to extend.


The last pockets are located on the front of the meal area. The large icepack fits in the back pocket (it goes from the top all the way down) and utensils and napkins fit in the shorter top mesh pocket.

All in all this seems like a good all-in-one backpack if it wasn't so heavy to carry. It didn't fit quite as much as the Isopack but for most people that wouldn't be a problem since they don't need to carry around the medical items that I carry around. Without them I could fit everything I would need to carry in this bag quite easily... it carries everything I need for daily usage already just not quite everything I keep in my carry-on bag. 

Wednesday, September 9, 2015

6 Pack Bags Expedition 500 VS Isolator Fitness Isopack, Part One: The Isopack


It was difficult to find a good comparison online of the two meal management backpacks I had narrowed it down to- the Expedition 500 and the Isopack. Since this was the case I ended up ordering both the Expedition 500 and the Isopack to compare and decide which worked best for me. I decided on the Isopack so the Expedition will be returned. I'm hoping that this post will help someone else that is trying to decide which to purchase so that they won't have to order blindly. Due to the large number of photos I have to divide the comparison into several pieces so first... the Isopack!


The front pocket (that has the logo) opens up like so:


As you can see from the photos the pockets are fairly deep. You could fit a wallet, passport, phone, keys and a few other odds and ends that you need regularly here very easily. I am going to be using this area to carry the contents of my purse (since I am no longer carrying one on weekdays... I am keeping an empty purse in my vehicle in case I end up needing to go to lunch for work or some such) plus my passport and medical ID when I travel. I forgot to take a photo of the chest strap but this bag has a chest strap to help with weight distribution.

Next we'll take a look at the laptop pocket.


I was easily able to fit my laptop, kindle and a notebook in this pocket. The kindle is in a pink case and it didn't go to the bottom of the pouch. The pouch within the laptop area is meant for a tablet computer according to the website and it looks to me like it would easily fit. 

Here are better photos of the kindle and laptop so that you can see the size.


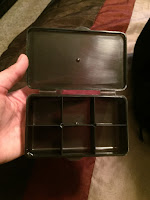
There is a small front pocket as well that I will be using to store utensils and a napkin. This is deep enough that I can put the two compartment plastic container with the green lid from a few photos down into and still easily zip closed. I will likely put  that container in this pocket when I travel filled with nuts and seeds or a protein bar.


The water bottle pouches are made of mesh which I am a little concerned will snag but they seem to be of similar quality to the ones on my Targus backpack which hasn't snagged in about 6 months of near daily use. Both my Camelbak Eddy and the H2O4K9 fit in the pockets without issue.


Next we will check out the main compartment. It is actually quite roomy and I was able to fit A LOT of stuff in the bag. Some of the small bags that you see here have been combined for my daily usage of this bag but when I was comparing them I was still trying out different organization methods with my cute new pouches I picked up while shopping with my mom last weekend. The photo on the left is for my daily use and on the right is for when it is being used as a carry on... everything fit in both cases. For the average user I will say that it can hold a binder, your gym clothes, and your toiletries easily. You may even be able to put your athletic shoes in the bag as well depending on what size shoe you wear and how bulky your clothing is. 


Here is the inside of the main compartment. It is quite deep and has a small mesh pouch on the front where I am keeping a small folded drawstring bag.


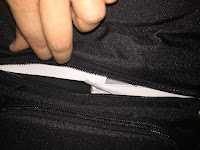
There is a zipper just above the front pocket that opens to a narrow pouch meant for the ice packs. It will fit one of the ice packs that come with the backpack. I had already purchased some of the smaller 7 oz. packs so I have a large one and a small one in the pouch and they fit perfectly.

EDIT: It can fit both of the large packs that come with the bag... I was just putting them in wrong. {brainfog} Oops!


Here are the pouches... the one on the left is what comes with this backpack and the right are the smaller 7 oz. versions that are used in some of the other Isolator Fitness bags. According to the website the larger ones can keep food chilled for 12-16 hours. I have only used the smaller ones so far but it was still chilly at the end of the business day in my lunchbox so I don't doubt it. Further, these pouches are not gel or liquid even when they are defrosted so they should work fine with TSA regulations. I will let you know if they say otherwise once I travel in a couple of weeks.


The final, and arguably most important, area is the meal management compartment.


I used the containers from the 6 pack bag as well as the ones that came with this pack to show an accurate comparison.


All five of the containers fit in the bag plus one extra. A comparison picture of how it compared to the 6 pack bags container is below.


Now for the containers that came with the Isopack. I was able to fit one of the large ones, two medium ones and two small ones plus the second large Isobrick.


Here is a photo of everything that fit in the cooler area.


If you are wondering how many of the containers you get here is a close up of one of containers as well as a photo of all the containers that came with the backpack. There were two 12 oz., two 16 oz., two 28 oz., and two 38 oz in the bag to mix and match as you need them. Isolator Fitness has extra containers for sale if you want to purchase more.


Next up: The Expedition 500...

Blog Refresh/New Location

Hey guys! I've moved my blog over to Weebly for a restart (everything here is already moved over there!) and to expand the possibiliti...