Showing posts with label beeswax. Show all posts

Monday, June 6, 2016

DIY Lotion Bars

I recently discovered lotion bars and I pretty much love them. In my opinion, they aren't for everything but I love being able to use them on my hands and arms after a wash-up without the grease that typically comes with lotions. Don't get me wrong, I love (and use regularly) my body butter... just for different purposes than I use lotion bars for. A lotion bar has become the go-to for my morning routine and I don't see it going anywhere anytime soon, especially with the hot Texas summer coming up!
A couple reasons I have a few of these bars around the house: 
  • I prefer them at work as I type and handle paperwork for a good portion of the day now (so my hands tend to get pretty dry) and body butter and lotion can leave grease marks behind for a few minutes after application... not so awesome, but a non-issue for a lotion bar! 
  • They don't require a jar or container. A plastic bag would be a good idea if you are going to travel with them in your bag or some such but decorative jars can get costly! I have purchased dozens of sample containers,  decorative jars, and etc. for gifts and for myself in the last year and the cost really starts to add up.
  • Your body heat is enough to melt a small amount of moisturizing 'lotion' onto your body as soon as it touches your skin but the bar still retains it's shape and doesn't melt away before my eyes. I'm in Texas, it gets really hot here if you didn't know (lol), and I've had DIY lotion melt in it's container when out in the heat for long periods of time before. These last much longer due and tend to hold their shape as the beeswax content is greater. 
  • They make pretty gifts and even decor while they sit waiting to be used.
Not sure if you would like them? The good news is that these bars are quick to and super easy to make so you can try them out without much at stake. Plus, you can customize them with various molds and additives to make pretty gifts for friends and family or as a bit of decor on the bathroom counter top... but you'll like them!
First Up, Gather Your Ingredients:
  • A ratio of 1:1:1 of Coconut Oil, Moisturizing 'Butter' and Beeswax (I used a mixture of Shea and Cocoa Butter in mine).
  • Vitamin E Oil (I like to add a few capsules worth of Vitamin E to my lotions for extra moisturizing power) *optional
  • Essential Oil(s) of you choice *optional
  • Decorative (dry) items of your choice such as cocoa, dried flowers/flower petals, dried zest, etc. *optional

The How-To:
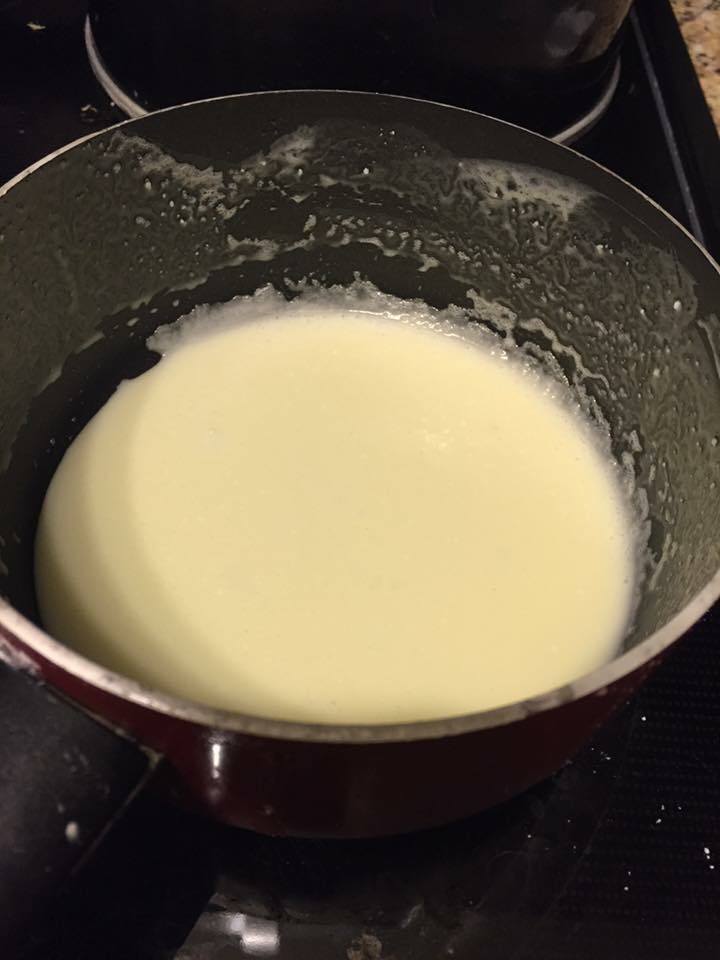
1. Melt all ingredients in a double boiler on low to medium heat. 
Don't have a double-boiler? No problem! Since I am living with my parents at the moment I don't actually use a double-boiler for this... just a pot of boiling water with a metal or glass bowl inside. It works great!


 2. Add in any essential oils you would like in your lotion bars.

3. This is your time to customize your bars! For the bars shown below I did the following (before pouring the mixture into the molds) to showcase the scent and add a bit of a decorative touch for gifts:
    a. Chocolate: Dust a small amount of cocoa powder onto the mold.
    b. Lavender: Sprinkle a few dried lavender buds into the mold.
    c. Sweet Orange: Sprinkle a bit of dried orange peel into the mold.
You could also do rose petals, dried lime or lemon rind, ground cinnamon or vanilla... the possibilities are endless! 
Note: Use dry ingredients so that the moisture content is correct.
 4. Pour the mixture into soap molds (or cupcake tins, chocolate molds, etc.) and pop into the fridge until they harden. 
4. After ensuring that the bars are fully cooled and solid remove them from the mold and package as you wish.

5. Give them away in gift baskets or as hostess presents... or use them yourself!


Tuesday, September 15, 2015

DIY Deodorant Update

A while back I did a post about DIY deodorant. I wasn't a big fan of the scent and the consistency needed to be firmed up a bit in my opinion. The original recipe can be found here and is pretty awesome in and of itself so you should go check it out. My tweaks are below.
INGREDIENTS:

1/4 C Coconut Oil
1 Tbsp Beeswax Pellets
1/4 C Baking Soda
1/4 C Cornstarch 
10 Drops Purification Oil
10 Drops Sweet Orange Oil
5 Drops Lemon Oil

OTHER:
Empty Deodorant Tube

PROCEDURE:
  1. Melt coconut oil and beeswax pellets slowly over very low heat in a small saucepan.
  2. Remove from heat once completely melted.
  3. Mix in cornstarch and baking soda until smooth.
  4. Add any essential oils you so desire. 
    • You can add the ones from the original recipe, the ones I am using or different ones altogether. If you do not have any oils feel free to leave them out, the deodorant will still work. 
  5. Pour mixture into an empty deodorant tube or other twist up container. I prefer to let mine sit for a minute and begin to settle then give it a quick mix before I pour it but this isn't necessary.
  6. Allow the tube to cool completely.
The tube can be a little difficult to get going but, out of all the variations of beeswax I have tried, this is the easiest while still remaining solid enough to use easily in a roll-on form.  
 

Friday, July 31, 2015

Super Moisturizing Lotion

For the past few months I have been experimenting with creating my own lotions, body butters, lip chaps and other moisturizers. To be honest, there have been so many batches of lovely smelling lotions in my kitchen recently that I couldn't possibly use all of it! Thankfully family and friends have been helping me try out the various versions I came up with and offering feedback. This one was one of the favorites as it isn't very greasy, helps to ease dry skin, and leaves skin silky soft. I also like it because I don't have to constantly re-apply to get the benefits, a single application can last me quite a long time even in a dry office building or out in the Texas sun. One thing to know about this lotion is that it set ups to be a thicker, creamy lotion than you may be used to. This means that you will end up taking a small amount out of the jar and using on quite a large area of skin rather than use a pump to dispense a large amount into your hand as it is not a thin liquid like you may be used to when you think of lotion.
NOTE: A single pound of these 'butters' will likely last you nearly a year's worth of lotion for one person or several months for a family so there is no need to over purchase.

INGREDIENTS:
1/4 C Cocoa Butter
1/4 C Olive Oil
1/4 C Coconut Oil
1/4 C Shea Butter

1/2 C pure aloe vera gel
1 Tbsp grated beeswax or beeswax pellets
 
1 tsp Vitamin E oil
Essential Oils of Choice (Optional)

EQUIPMENT:
Small saucepan
Measuring cups/spoons
Knife
Spoon
Electric Mixer
Container to hold your lotion (about 1.5-2 C of lotion comes from this recipe)

PROCEDURE:
1. Measure out your ingredients. You will likely need a knife to cut the cocoa butter. 
2. Place the shea butter, cocoa butter, coconut oil, and olive oil in a small saucepan on LOW heat. You do not want the mixture to boil or smoke... it needs to be kept very low. The ingredients will melt fairly quickly even on low heat so watch carefully.
3. Once everything has melted, mix in the vitamin e oil and aloe vera gel and remove from heat. 
4. Add in any essential oils you may want for added scent or aromatherapy needs. I prefer peppermint as it smells delightful with the cocoa butter but I have used sweet orange (think one of those chocolate oranges in scent), lavender (for calming, evening use especially), and a unique mixture of citrus (lemon and lime) and frankincense for one individual. You can be as creative as you want or stick with the plain version which smells slightly of chocolate from the cocoa butter.
5. Allow the lotion to cool until it has just begun to set up. You can just leave it on the counter for a few hours and go about your day or be like me and toss it into the freezer for 10-15 minutes to speed up the process. 
6. Once it has begun to set up you will use the electric mixer to beat the lotion into the creamy consistency we are looking for. This adds air to the mixture so that it isn't quite as dense. 
NOTE: If you let the mixture get to hard/cool then it is easy to apply a little heat and mix with a spoon for a minute or two to get back to the correct consistency.
7. Add it to a jar and allow to finish setting up for half an hour or so.

Curious where I get my ingredients? I get my ingredients all over the metroplex, on Amazon and through Young Living as a distributor. Don't want to search out stores to pick them up? I'll make it easy! You can place an order through me for any oils you may need and there are quick links for the non-perishable ingredients and tools on Amazon should you wish to order online on this page... just click on the ingredient.

Thursday, July 23, 2015

Homemade Deodorant

I am allergic to aluminum... this means traditional, store bought, deodorants are pretty much off the table for me. Now-a-days this doesn't bother me as I've seen quite a bit of research to show that our traditional deodorants with antiperspirant properties are bad for you anyways but for years it was the bane of my monthly shopping expedition. Until you have tried more store-bought options than you can remember you just don't understand the struggle to find a good aluminum free deodorant. Ones I remember off the top of my head:
  1. Tom's- It failed... miserably... peaches and sweat is NOT a good combination people! This battle was about half my college career... it was not pretty.
  2. Adidas - They stopped making their aluminum free stick deodorant RIGHT after I realized it seemed to work pretty well of course. Still a college student in a small town with only Tom's peaches and sweat option I jumped on this while I had the chance.
  3. ClayDry- This seems to work fairly well and was recommended by the owner of the store I purchased my essential oils from while living in California but it smells similar to gin so was far from my favorite option.
  4. Lavolin 36 hour- This one works pretty amazing actually but I am distrustful of something that mysteriously lasts through my shower... just saying. I used the roll-on kind which is a little expensive but takes a few months to get through so this was my go to... until now!
  5. many many others...
A little less than a year ago now I started cutting out chemicals from my household cleaners and slowly that trickled into my 'beauty aisle' type products such as lotions and shampoo. I had developed some chemical sensitivities in the past few years and I wanted to reverse the adverse effects and become healthier in general... especially if we were going to have children someday which was coming up in conversations. Eventually I got to the point where I wanted to make them at home so that I knew exactly what I was putting on my body and in the air in my home plus save some money. So I began my search for a diy all-natural deodorant. There are a ton of recipes out there but many of them are pastes and I really didn't want a paste that I needed to spread on my underarms... it seemed messy and honestly, I really wanted something that was easy to apply and travel with. One of the recipes I found that seemed like it would work really well is here. So I gave it a try and it was pretty straight forward and easy to create. The recipe made 2 tubes of deodorant just like she said it would and it works!


The ingredients were pretty much things I already had on hand in my house (except corn starch but that was a quick fix at the grocery store and now I have more than enough for my suburban homesteading/diy adventures to come for quite a while): cornstarch, baking soda, coconut oil, beeswax, and essential oils (lemon, frankincense, and lavender).
I simply followed the step by step directions to combine all the ingredients with low heat then add in the essential oils once well combined. It was a quick recipe to follow and ended up giving me two beautiful sticks of deodorant.
One note: it is a little difficult to get them to turn properly with my containers at first but I just used a towel to get a firm grip and kept turning until it began to move and now there are no issues.

I've been using the deodorant for about two weeks now and have had no problems with smelling sweaty and gross in the day to day activities, even in a Texas summer!

Now for the problems...
  1. I do NOT like the scent, it smells too masculine for me personally. Luckily when I make my next batch (I'm giving one bar away to a fellow aluminum-allergic POTSie friend so maybe in a month or so) I can change the scent. The scent is growing on me though so perhaps I'll just decrease the amounts of the oils to lighten up the scent. We shall see...
  2. The deodorant seems to melt as I am putting it on so the spread-able factor isn't quite right. I will fix this by adding a little more beeswax next time.
That's it... all in all I would review this recipe very favorably. Next batch I make I will give the changes I proposed a go and add an update to this post.

UPDATE: I have tried about a million combinations at this point it feels like. I ended up halving the recipe but upping the beeswax and using Purification oil and Sweet Orange Oil plus a little bit of Lemon Oil to create the deodorant I am using now. I will post an official update post with the measurements in September.

Give it a try... it's easy, healthier than store bought options for your body, and quite inexpensive to boot! 

I will be sharing my lotion/body butter recipe soon (wonderfully rich and silky... and only slightly more complicated than this recipe) so look for that in a few weeks! What would you guys like for me to try and make next? Comment below!

Curious where I get my ingredients? I get my ingredients all over the metroplex, on Amazon and through Young Living as a distributor. Don't want to search out stores to pick them up? I'll make it easy! You can place an order through me for any oils you may need and here are some quick links for the non-perishable ingredients and tools on Amazon should you wish to order online:

Blog Refresh/New Location

Hey guys! I've moved my blog over to Weebly for a restart (everything here is already moved over there!) and to expand the possibiliti...